


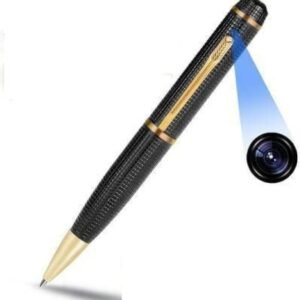
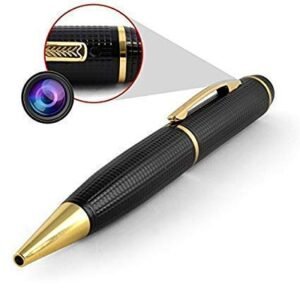
Description
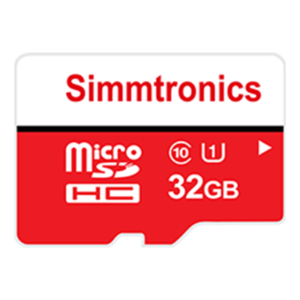
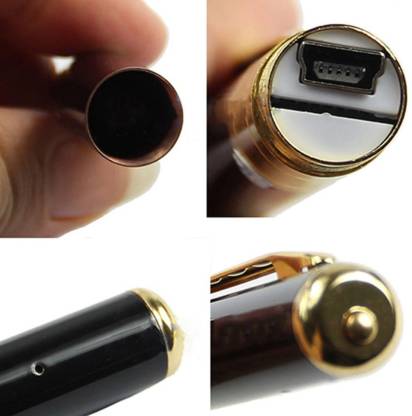
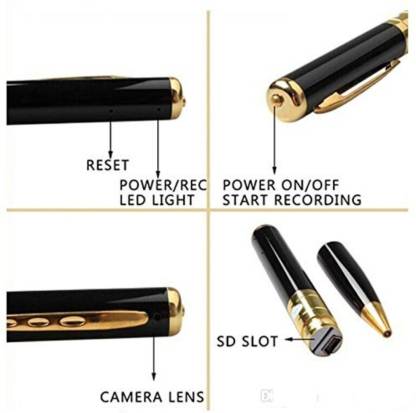
720p HD SPY PEN CAMERA. Charging Your Spy Pen (First time only, charge for 3 hours.) Plug the USB cable into the pen and plug the other end into your computer. (see diagram). Your spy pen’s light will blink while charging. Once the blinking light turns solid, your pen is fully charged. Disconnect the Spy Cam Pen once the charge is complete. A full charge should accommodate about 1.5 hours of recording time. Insert the Micro SD Memory Card Gently, yet firmly slide the micro SD card into your spy pen slot. You should feel resistance when your micro SD card is fully inserted into the pen. Approximately 1/8″ of the micro SD card will be visible when it’s inserted correctly. Power up the Spy Cam Pen by pressing the on/Off Button on the top of the pen for 3 seconds. (To power off, press on/Off Button for 3 seconds.) Check the status light to ensure the Spy Cam Pen has powered up properly. It will display a solid green LED light to indicate that the Spy Cam Pen is on and ready to record or take a photo. (Solid green light indicates Ready Mode.) Start recording with the Spy Cam Pen by pressing the on/Off Button on the top of the pen for 2 seconds. Check the status light. The LED will blink several times to indicate that recording is about to begin. Once recording begins, the light goes out (or a dim, delayed blinking light may occur) so it does not attract attention during a covert recording session. To stop recording, administer one quick tap to the on/Off Button on the top of the pen. The green LED status light will illuminate to indicate the Spy Cam Pen is in Ready Mode and prepared to take a photo or resume recording. Take a still photo by administering one quick tap to the on/Off Button on the top of the pen. The green LED status light will blink once to indicate that it has captured the photograph.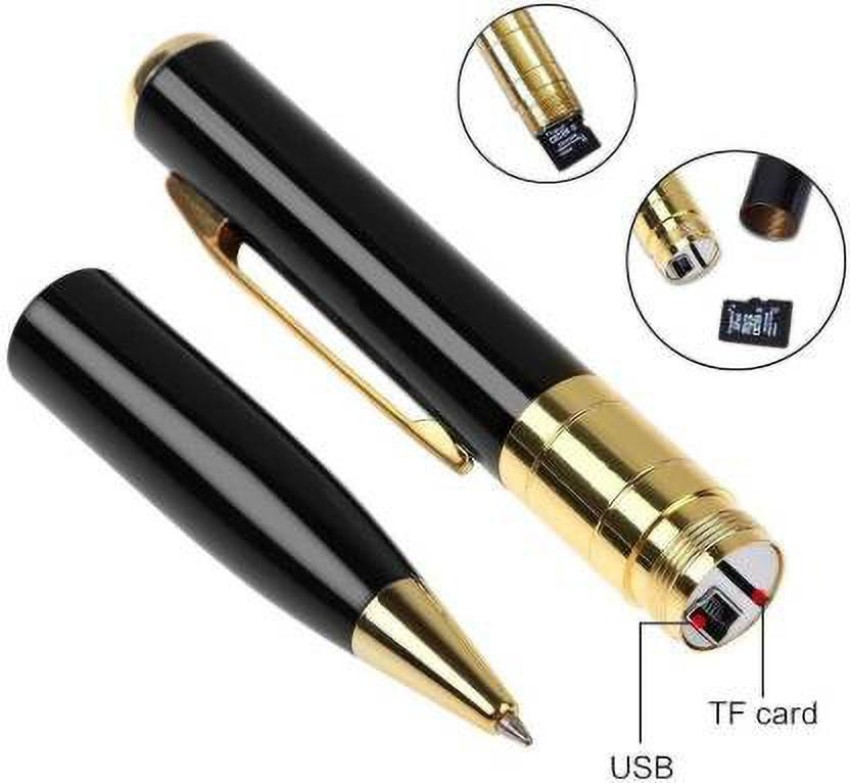


Somya Mishra (Verified Customer) –
I wanted to share something with you that I’ve been using for a while now and it has been a game-changer for me. It’s a camera/pen that I use to capture important stuff that I couldn’t use my smartphone for. I was skeptical at first, but I couldn’t believe how much a small thing could be capable of doing a big job. it has helped me, saved me, and enabled me to win my case. I highly recommended it to anyone who needs to capture important stuff silently. However, I want to emphasize that It’s important to use it legally. it is not meant to be used for any illegal activities or to invade someone’s privacy. it is simply a tool that can be used for legitimate purposes.
Great Video quality when there is enough light works great.
Rahul Joshi (Verified Customer) –
Very nice and usefull products
Kunal sharma (Verified Customer) –
Usefull product
Rohit Sharma (Verified Customer) –
Clear view and easy to use camera.
Aman Kumar (Verified Customer) –
Better
Lakshmi (Verified Customer) –
Nice look and very easy use
Kashif Khan (Verified Customer) –
Nice product
Rishav Kumar (Verified Customer) –
Good product
Shishupal (Verified Customer) –
Video quality very good
Jagdish Singh (Verified Customer) –
Quality of video and audio is good. Awesome product for spy recording.
At this price range best from all alternative
Anup Kumar (Verified Customer) –
Sound is clear and video quality also good this quality is 1080 p I also give 5 star rating because this is nice
Hardeep Singh (Verified Customer) –
I like in this product is camera which good is good and best in quality with the minor in shape. I think you also buy this pen a very good quality in record wide area.
Durgpratap singh (Verified Customer) –
Quality of video and audio is good. Awesome product for spy recording.
Pervesh (Verified Customer) –
Awesome
Amit Kumar (Verified Customer) –
Amazing service and great product availability
Ajay Kumar (Verified Customer) –
Good video recording. Audio clear. Good performance. Battery life is very medium. But ok, it’s overall good product. Thanks to the designer
Angad Singh (Verified Customer) –
Quality of video is good. Customer service is excellent. Good demo to understand features and understand how to use
Jyoti Rajpoot (Verified Customer) –
Good quality product as expected,
Works well and highly recommended.
Vikrant Singh (Verified Customer) –
Thanks minispy
Seller contact me and it’s good
RAJNI SHARMA (Verified Customer) –
Amazing quality
Sajan singh (Verified Customer) –
Gajab
Sonal (Verified Customer) –
This product is pretty cool as a spy camera. Audio is fantastic as well as video.
Multan (Verified Customer) –
Good performance product
Anil Kumar (Verified Customer) –
Very easy to use and good battery life
Neha mishra (Verified Customer) –
Nice product very good picture quality
Zaved Ansari (Verified Customer) –
Just awesome…!!😍
Abhishek (Verified Customer) –
Good product
Aakansha (Verified Customer) –
capture high quality videos including photos
Abhilash Pandey (Verified Customer) –
Awesome pen camera
Basit Khan (Verified Customer) –
performance is good
Basit Khan (Verified Customer) –
Its awesome product
Tinu Sahai (Verified Customer) –
Best
Jayant Mehta (Verified Customer) –
Ok good…👍🏻 not very good as I had expected but can be liked by everyone if they will purchase 🤗
Yaa it is recommend😌❤️
Krishan Sharma (Verified Customer) –
Cool design
Dheeraj Sahai (Verified Customer) –
Product are very good valu for money
Mr Ravinder Verma (Verified Customer) –
Osm
Megha Verma (Verified Customer) –
Osmvery good
Jaya Saxena (Verified Customer) –
Nice pen
Nitin Saxena (Verified Customer) –
Over all good experience about the product, camera quality is good, easy to use
easily accessible
Neetu (Verified Customer) –
Good quality
Good voice and video quality
Pranav (Verified Customer) –
Best pen camera for spy activities, other pen camera are not clear but this one does the job well, must try
Ekta Giri (Verified Customer) –
It was delivered well in time.
Pros:
1. Product quality is good.
2. Ease of operation is also great.
3. Pic and video quality is also satisfactory.
Cons:
1. Not sure why but when taken to field test audio did not appear as clear as video and picture.
2. It’s just a bit heavy pen to sit in pocket hence it will not sit straight. You have to stand diagonal to collect proper video.
3. Time stamp to be set up every time you start the pen on. As soon as it is switched off the time goes to default.
4. It creates multiple file if you are taking long video recording. Not sure if it is a good feature or bad.
Simratjit Singh (Verified Customer) –
I like this product. This is safe to carryout and keep me protected from offending people during my working hours and day.
Jaidev (Verified Customer) –
Good quality. Go for this without a second thought. Love this product
Gaurav (Verified Customer) –
Happy Purchasing
Pawan Garg (Verified Customer) –
Nice product. I had some questions and contacted the support team. They did a video call and explained all the features. Pretty impressed with the customer support.
SONI (Verified Customer) –
The pen is ofcourse excellent in terms of working. Customer support was great. I have never got this kind of service ever. They explained everything step by step on video call.
Anshul (Verified Customer) –
Good product and great customer support
Satendra Kumar (Verified Customer) –
Picture and sound quality is excellent.
It is very easy to use.
Although it is a bit expensive, I think the price is right for its quality and accessories.
The first time I received a defective product, but Amazon replaced the defective product with a perfect product within 4 days. Thanks to Minispy and of course a special thanks to the seller.
Hivish (Verified Customer) –
Very good product. Nice camera
Geetanjali Kakkar (Verified Customer) –
I liked the hd camera. It worked nicely. Then pen camera is handy to use. of the pen starts video with three click of the button and camera starts with one click. The photos taken and videos taken by it are in HD quality one can also practice before using it in any place. It is very handy and easy to use for spying. It is one of the sophisticated product
SANDEEP (Verified Customer) –
Working good and easy
Tarika (Verified Customer) –
Very good product. Nice camera and its accessories
Rashi (Verified Customer) –
Very good
Easy to use
Neeraj (Verified Customer) –
Superb
Samir (Verified Customer) –
Best Spy can you must have
Nikhil (Verified Customer) –
Picture and sound quality is excellent.
It is very easy to use.
Although it is a bit expensive, I think the price is right for its special thanks for minispy
Ritu Dubey (Verified Customer) –
Video and audio quality is good 👍
Ankit Jindal (Verified Customer) –
The product came with all accessories like charger, SD card reader and even USB to type C and a demo.
I had some confusion and the team (number written on demo) taught me everything properly.
Sunny (Verified Customer) –
Perfect product. Great demo by team
Chavi Pandey (Verified Customer) –
osm image and video qualty
RK Ritik (Verified Customer) –
Purchased for power harassment prevention and crime prevention.
It’s a pen that doesn’t feel more uncomfortable than I thought, and if this is the case, it’s fine if it’s in the chest pocket of a pen case or suit.
Above all else, it has the best cost performance.
Operation has been checked all the way, but so far the SD card has been inserted, and the data has been recorded without problems.
If you want to try one more bottle for something, it’s cheap and I recommend it.
Amjad Khan (Verified Customer) –
I was surprised that it was a normal pen with no sense of incongruity at all
Ranjan Rawat (Verified Customer) –
It’s cheap price and has great features!
Aman Rastougi (Verified Customer) –
I was surprised that it was a more normal ballpoint pen than I had imagined!
Operation is also easy.
Can be used for work
ZREEN KHAN (Verified Customer) –
There are no complaints about both the sound and the video, so I think it’s better to practice before using it because you’ll be in trouble if you can’t take pictures
Vikash (Verified Customer) –
use it without problems
Kranti Ahalawat (Verified Customer) –
I was able to shoot well.
At first, I didn’t understand, but I had a hard time.
Once you get used to it, you can use it normally.
Raju mishra (Verified Customer) –
gajab
Balvinder Singh (Verified Customer) –
great perfomance
Krishna Mukherjee (Verified Customer) –
An easy to use pen for beginners
Kamla mishra (Verified Customer) –
Good price performance
Sanam kumar mishra (Verified Customer) –
I think this image quality is reasonable at this price.
Krishna Rani (Verified Customer) –
it’s perfect
Jagdish Singh (Verified Customer) –
It’s good because it’s easy to carry. It is clearly visible in daytime light. Shooting in dark places doesn’t look good, so it may not be suitable.
Ajay Kumar (Verified Customer) –
easy to use
Raju Das (Verified Customer) –
Great Video quality when there is enough light works great.
Naveen Gupta (Verified Customer) –
The camera was easy to turn on and off, and the operation method was simple
Guddu Gond (Verified Customer) –
The camera was easy to turn on and off, and the operation method was simple, so I think it’s really suitable for first-time users. But I often get jittery, so that’s the only thing that’s a pity, other than that, it’s perfect!!
Deepak Yadav (Verified Customer) –
The image quality is beautiful, but it’s safe in case of trouble
Umesh Kumar (Verified Customer) –
looking good
Raja Tanwer (Verified Customer) –
The
shooting figure is inconspicuous · Since it’s a
pen type, it’s not bulky · It can shoot as it is · It picks up sound quite a bit [Improvement request points] · I want a wide angle or zoom function · I don’t know if I’m shooting or not, so I want a landmark that shows I’m shooting during shooting (the light also goes out, so I’m
uneasy about shutting down or shooting is in progress